Assembly
Assembly
Thank you for your purchase! We want to make it as easy as possible to unpack, assemble and get you up on your stilts. In order to do so, please read this page for assembly instructions, we will also share a How-To video that will walk you through the process. You will need a few tools to complete your project. If you don’t have them, borrow them from a friend, they are common tools.

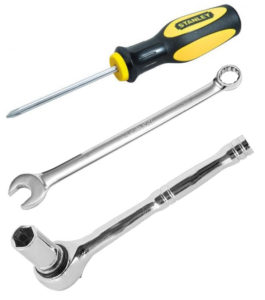
Drill, with 1/4″ drill bit, needed to make holes in your shoe to mount.
Next, you’ll need a Phillips Head screwdriver,
7/16″ wrench and 7/16″ socket.
STEP 1) Unpack and Assemble “Rig”
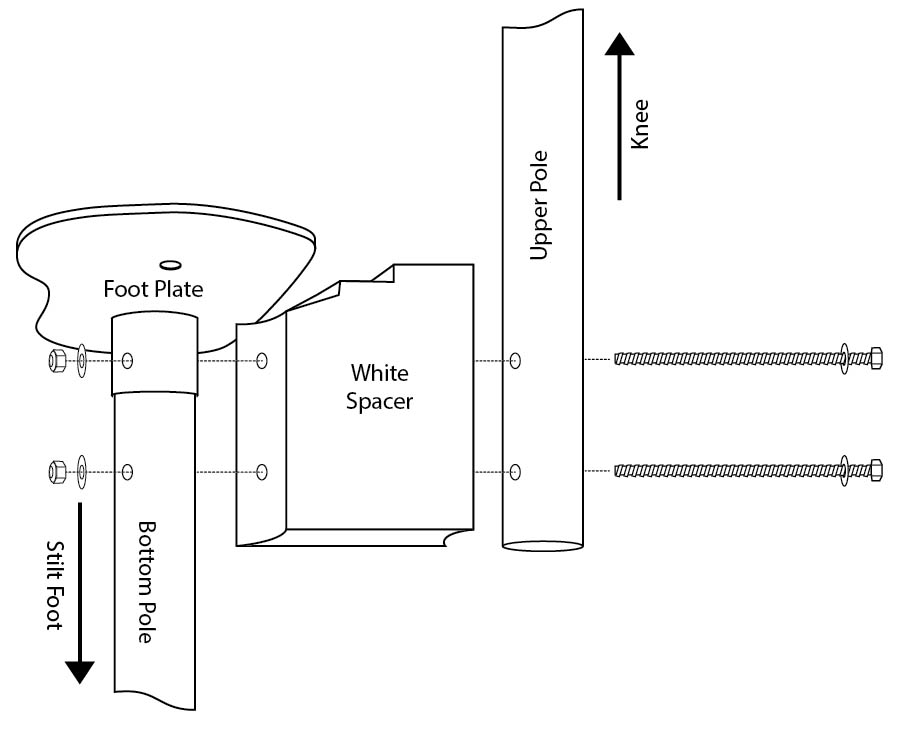
Your stilt “Rig” section – the upper assembly.
- First, unpack all parts of your stilts
- Separate left and right stilt components, each are marked
- Slide (right) footplate onto (right) leg and align holes-
inside the tube will show an arrow for “front” - Align the Leg pole, white plastic spacer, and upper leg pole
(More clearly shown in the illustration to the left) - Slide the long bolts through the aligned holes
Make sure washers are sandwiched between bolt head and nut - Use 7/16″ wrench and socket to tighten firmly, but not to dent poles
- Do the same process for the Left stilt
STEP 2) Attaching Leg Brace
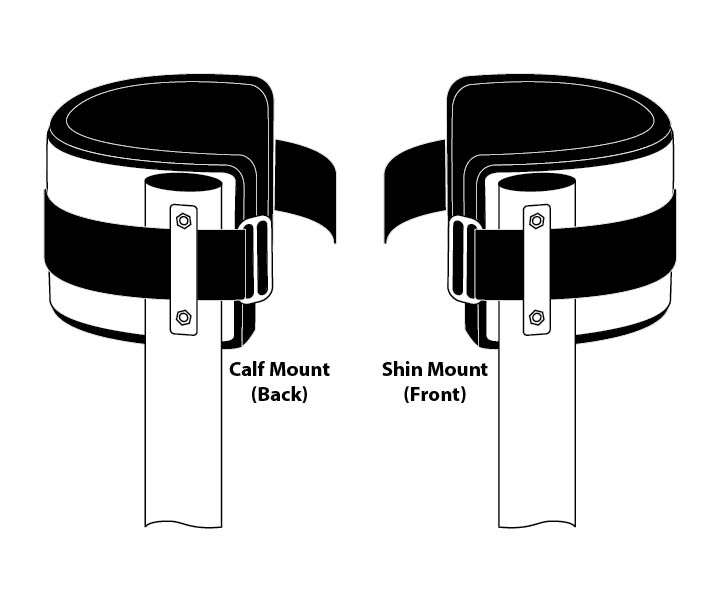
The leg brace is the mount that wraps around your leg, just below the knee. Our Stilt Factory braces can be mounted in front (shin brace) or back (calf brace).
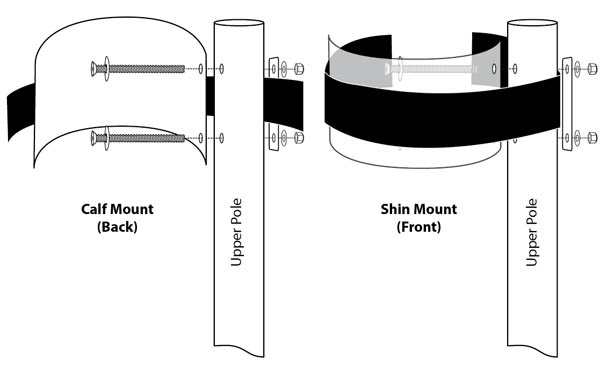
- Align curved metal brace to upper pole (facing forward or back)
- Push long screws through holes of brace and pole
- Apply mount plate, then washer and lock nut. Finger tighten
- Insert black leg strap between pole and mount plate
- Insert leg brace padding
- Adjust strap and buckle
- Remove padding
- Tighten top and bottom screws/nuts
- Reinsert padding
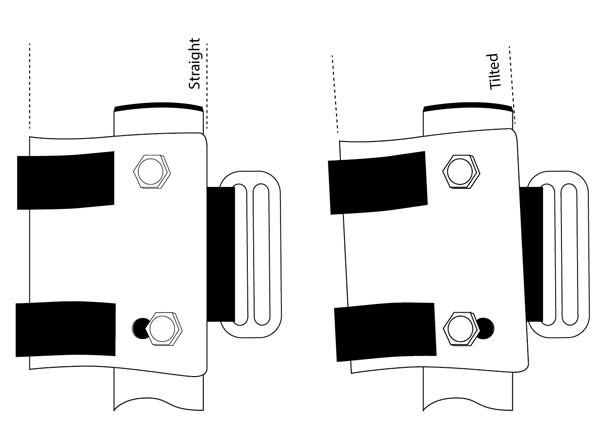
Brace tilt settings
Stilt Factory leg braces have 2 tilt settings-
Straight and Tilted.When assembling the leg brace, you can mount using either hole. Follow the assembly instructions listed above.
STEP 3) Mounting Your Shoes to the Footplate
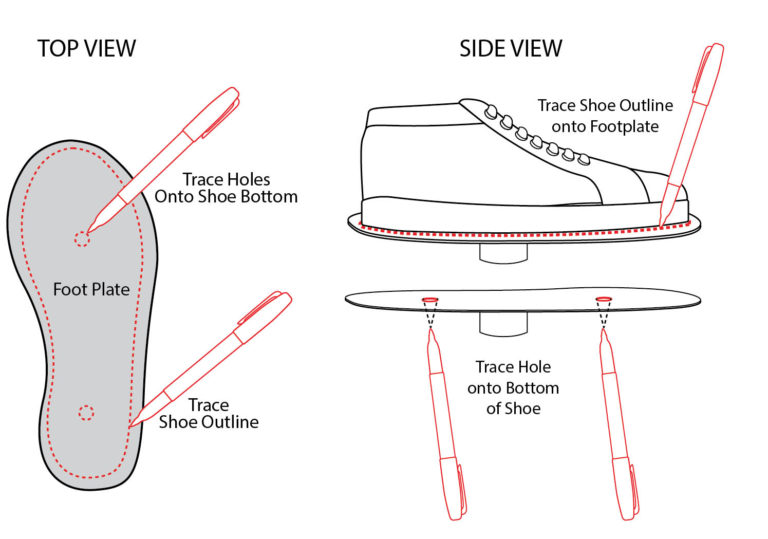
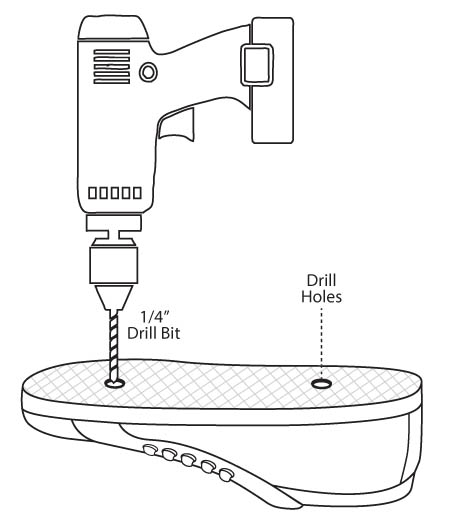
We recommend soliciting the help of a friend, although it’s not completely necessary for this process. Please watch our instruction video for detailed instruction! 1) Get some good fitting comfortable shoes to mount to your stilts. We recommend athletic style shoes, preferably high-tops. We get ours at thrift stores or yard sales! 2) Put the shoe on your foot. Place your foot onto the footplate and mount the upper strap around leg and velcro secure. Find where your weight distribution and alignment works best for you. We recommend using Duct Tape to wrap around the shoe and footplate to help assess optimum placement (please see video for instruction). Once you have established where the foot placement is best for you, remove strap from leg, take foot out of shoe and leave shoe taped to footplate. Take a Sharpie and trace around the soul of the shoe to mark the footplate. 3) Using the holes on the bottom of the footplate, use the Sharpie to mark the bottoms of the shoe soles through those holes.Again, the video shows the process more clearly. 5) Remove insert from shoe (if it has one). Looking at the bottom of your shoe, use the marked spots to drill a hole using a 1/4″ drill bit. DRILL ONLY THROUGH THE SOLE, not the top of the shoe!
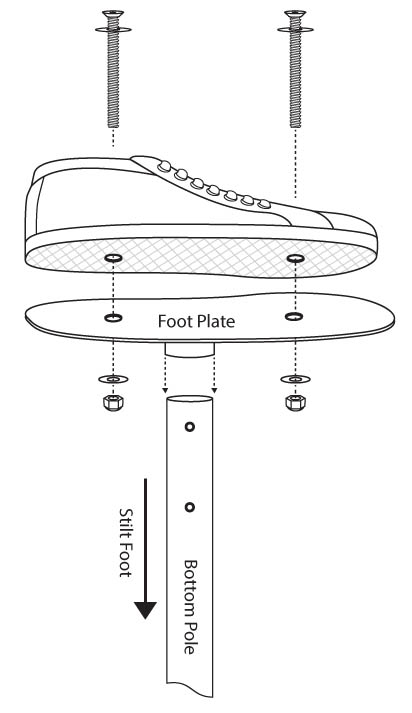
6) Place shoe onto footplate and align holes. Place screws, with washers, inside the shoe, into the holes. Once through the shoe and the footplate, add washer and nut, then tighten firmly. (The holes in the footplate are larger so that you can move the shoe to the perfect position.)
7) Put insert back into shoe on top of the screw heads. If your shoes do not already have shoe inserts, we recommend getting them!
8) Reminder: after a period of time, the pressure of the screw will compress the shoe sole. This may cause the shoe to become loose on the footplate. Please check your shoe mount and tighten them to the footplate if they become loose.
STEP 4) Safety Check
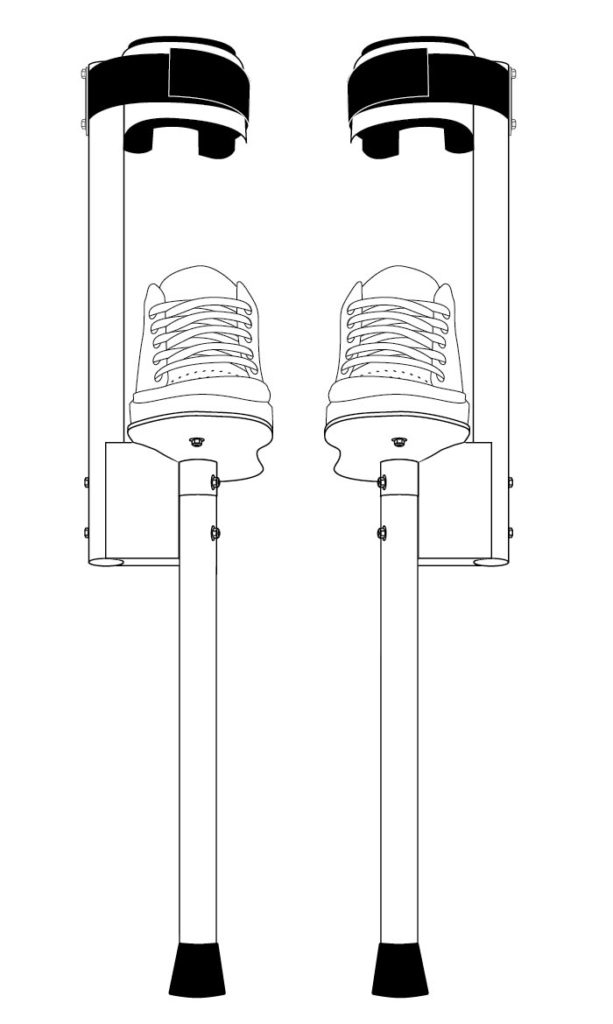
Once your stilts are assembled, they should look like this.
Shown: Shin (front) mounted leg braces
ALWAYS CHECK YOUR STILTS BEFORE USE! Make sure all parts are properly mounted and assembled and that there are no broken or dangerous elements, your safety is the utmost importance. If you have any questions regarding your gear, please don’t hesitate to contact us.
Start at top, checking components down,
Visual and mechanical inspection:
- Straps and leg braces
- Upper poles
- Rig assembly
- Shoes and mounts
- Lower poles
- Feet
See our instructional video on stilting basics for putting on your stilts and start walking!